
 Bobby Wilson
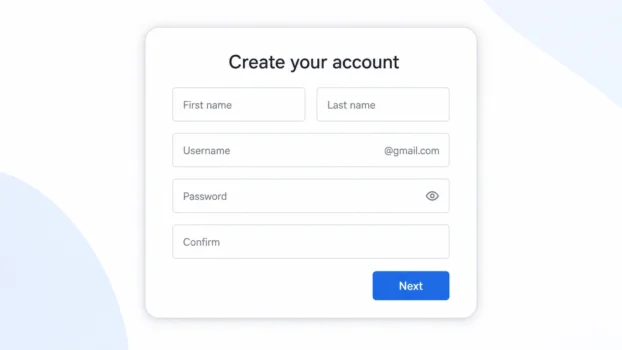
To create a Gmail account, go to Google’s account sign-up page, select Create account, and choose For my personal use. Google will then ask for your name, date of birth, preferred Gmail address and a password.
Your Gmail address will consist of a username you choose followed by @gmail.com. For example, choosing firstname.lastname would create an address ending with firstname.lastname followed by @gmail.com.
Creating Gmail also creates a Google Account. The same sign-in details can be used for Gmail and other Google services.
What you need before you start
You can create a Gmail account using a computer, phone or tablet. Before starting, it helps to have:
- An internet connection
- An idea for your Gmail username
- A password that you have not used for another account
- Access to a mobile phone if Google requests verification
You do not need an existing email address. This means you can follow these steps even if this will be your first email account.
The screens may look slightly different depending on the device you use and whether you are already signed in to Google. Follow the options shown on your screen if they differ slightly from the screenshots in this guide.
Step 1: Open the Google account sign-up page
Open a web browser such as Chrome, Safari, Edge or Firefox.
Go to the Google Account sign-in page and select Create account.
A menu will appear asking what type of account you want to create. Choose For my personal use when you are making an ordinary Gmail account for yourself.
Google may also show options for creating an account for a child or for a business. Those accounts follow a different setup process.
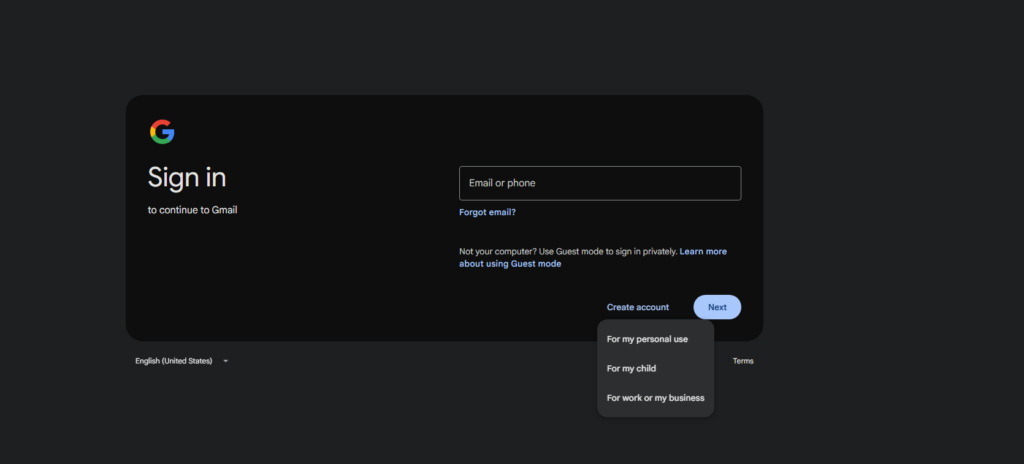
If another Gmail account is already open, you can still create a new one. Select your profile picture in the top-right corner, choose Add another account, and then select Create account.
Step 2: Enter your name
Google will ask for your first name and surname.
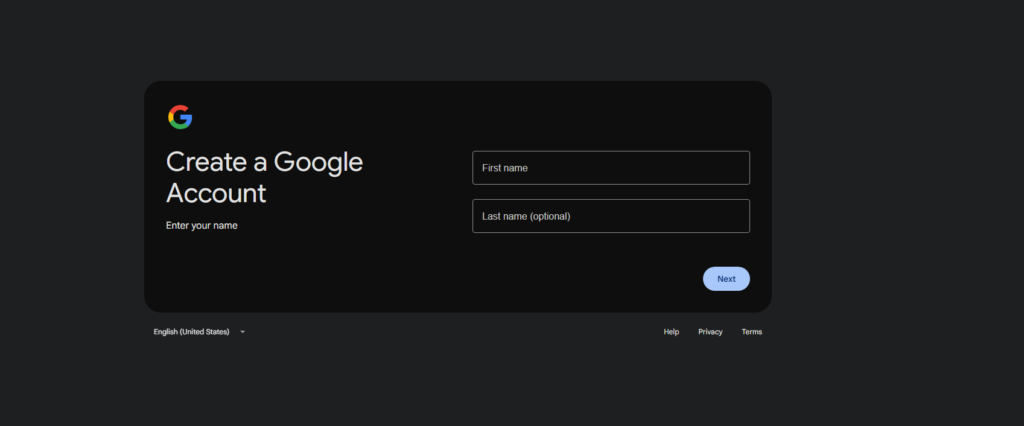
Enter your name and select Next.
This is the name that may appear beside messages you send. It does not have to be the same as the username in your Gmail address.
For example, someone could enter:
- First name:
Firstname - Surname:
Lastname
They could then choose a Gmail username such as firstname.lastname, if it is available.
Check that your name is spelt correctly before continuing. You can change the name displayed on your Google Account later, but it is easier to enter it correctly during sign-up.
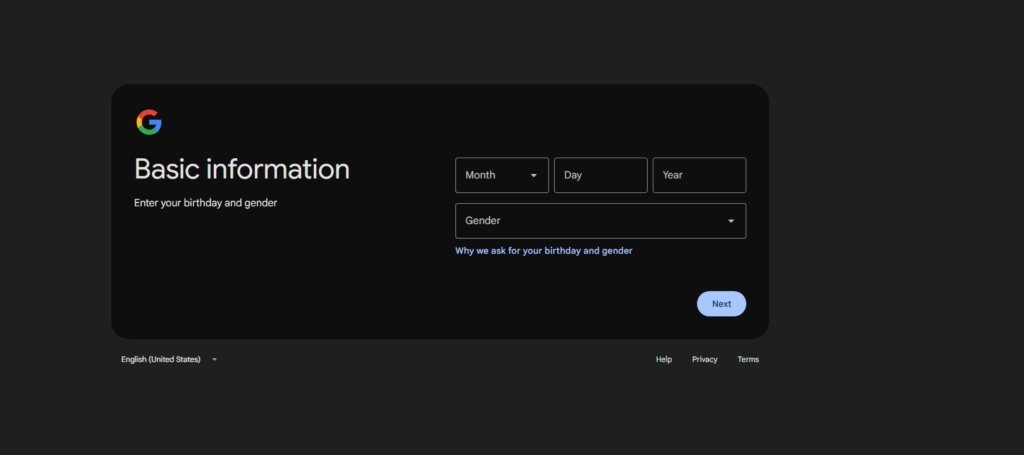
Step 3: Enter your date of birth and gender
Google will normally ask for your:
- Day of birth
- Month of birth
- Year of birth
- Gender
Enter the requested information and select Next.
Use your correct date of birth. Google uses it to determine which account settings and services are appropriate for your age.
If you are creating an account for a child, return to the account-type selection and choose the option for a child’s account instead.
Step 4: Choose your Gmail address
Google will now ask you to choose your new Gmail address.
It may suggest one or more available addresses based on the name you entered. You can select one of these suggestions or choose the option to create your own Gmail address.
The part you choose is your username. A username is the unique name that appears before @gmail.com.
For example:
- Chosen username:
firstname.lastname - Gmail ending added by Google:
@gmail.com
Together, these form the complete Gmail address.
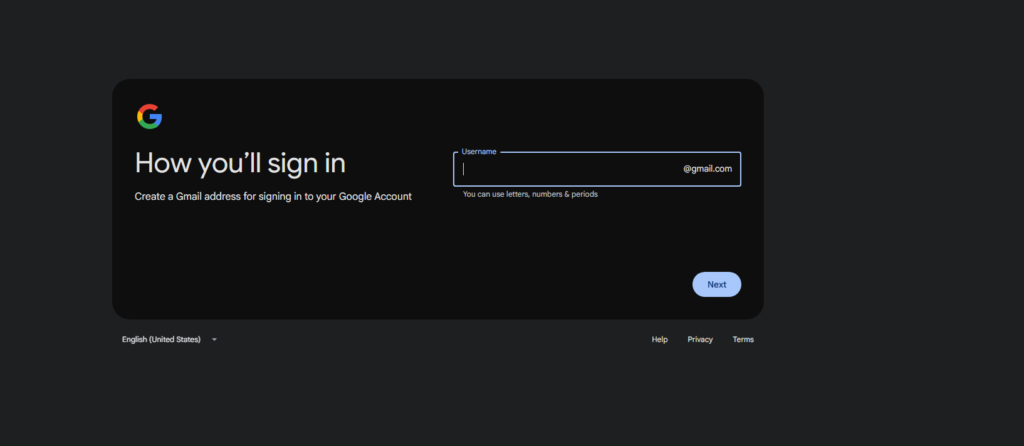
How to choose a Gmail username
A simple version of your name is usually suitable for a personal Gmail account.
You could try formats such as:
firstname.lastnamefirstnamelastnamefirstinitiallastnamefirstname.middleinitial.lastname
If your preferred username is already being used, you may need to add a short number or another part of your name.
For example:
firstname.lastname27firstname.m.lastnamefirstinitial.lastname27
These are deliberately generic examples. Replace firstname, lastname and firstinitial with your own information when creating the account.
Choose something that you will be comfortable sharing with employers, schools, medical services, banks and other organisations. Avoid usernames based on jokes or temporary interests if this will be your main email address.
Do not include sensitive information such as your full date of birth, telephone number or home address.
What if the Gmail username is already taken?
Every Gmail username must be unique. You cannot create an address using a username that has already been registered.
A username may also be unavailable because it was previously used and deleted, is too similar to an existing username or has been reserved by Google. Deleted Gmail usernames are not normally made available for someone else to register.
If your first choice is unavailable, try:
- Adding your middle initial
- Shortening part of your name
- Reversing the order of your names
- Adding a short number
- Including another word that is easy to remember
Avoid adding a long string of random numbers. You will need to remember the address, type it correctly and sometimes tell it to another person.
Step 5: Create a password
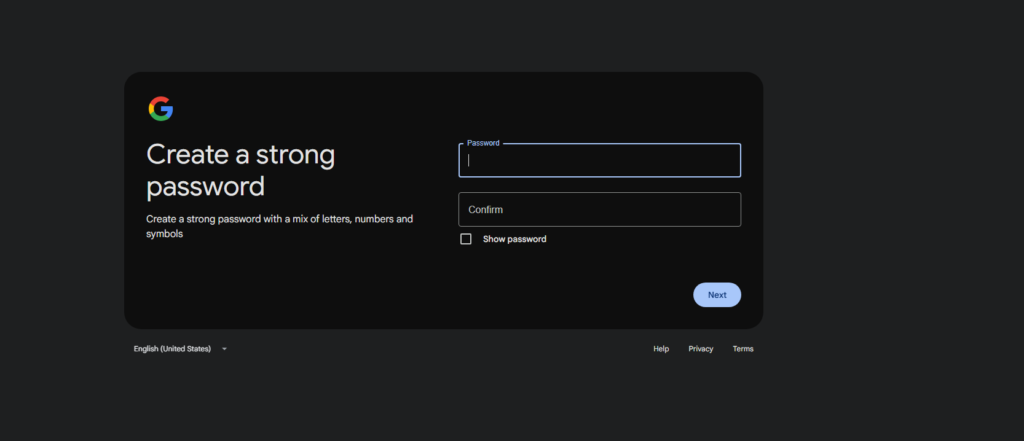
After choosing your Gmail address, Google will ask you to create a password.
A password is a private set of characters used to protect your account.
Enter your chosen password in the first box. Enter the same password again in the confirmation box.
Use a password that:
- You have not used for another account
- Is difficult for someone else to guess
- Does not contain obvious personal information
- You can store somewhere safe
Avoid simple passwords based on your name, date of birth, favourite team or common number patterns.
Google may provide an option to show the password. This can help you check that both entries match, but make sure nobody else can see your screen.
Select Next when both password boxes have been completed.
Step 6: Complete any verification Google requests
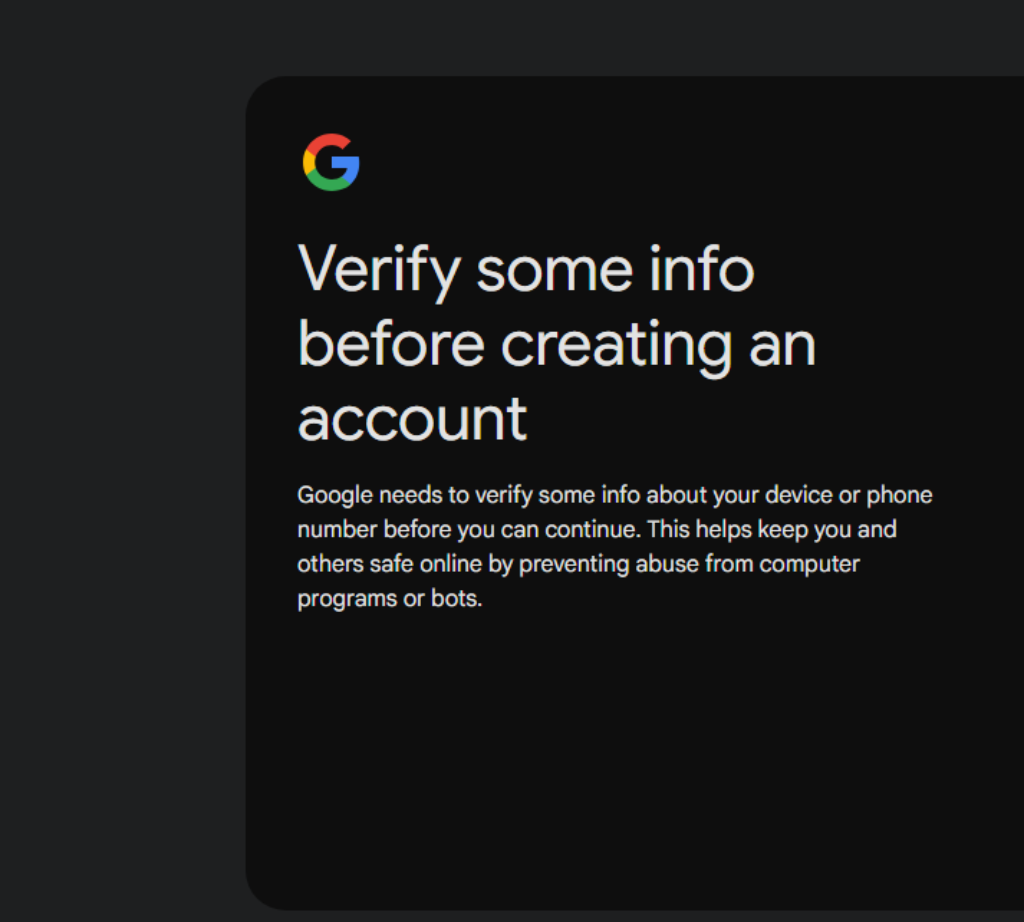
Google may ask you to verify that you are a real person creating the account.
The exact verification step can vary. You may be asked to enter a mobile phone number, receive a code by text message or complete another check shown on the screen.
If Google asks for a phone number:
- Check that the correct country is selected.
- Enter a mobile number you can access.
- Select Next.
- Wait for Google to send a verification code.
- Enter the code on the sign-up page.
A verification code is a temporary set of numbers used to confirm that you have access to the phone.
Follow the instructions shown on your screen. You may see a Skip option, but this is not guaranteed to appear during every sign-up attempt.
If a text message does not arrive, check that:
- The telephone number is correct
- The correct country code is selected
- The phone has a mobile signal
- The phone can receive text messages
Wait a few minutes before requesting another code.
Step 7: Add recovery information if requested
Google may ask you to provide a recovery email address or recovery phone number.
A recovery email address is another email account that can help you regain access to Gmail if you forget your password.
If you already have another email account, you can enter it here. It must be a different address from the new Gmail account you are creating.
You may be able to skip this step. This is useful if Gmail will be your first email account and you do not have another address to provide.
Recovery information can also be added or updated later through your Google Account settings.
Step 8: Review your account information
Google may show your new Gmail address and ask you to check the information entered during sign-up.
Review the details carefully.
Pay particular attention to the Gmail username. Make sure it is spelt correctly and that you will be able to remember it.
Select Next or the equivalent button shown on the page when the information is correct.
Step 9: Read and accept Google’s terms
Google will show its privacy information and terms before completing the account.
Read the information shown on the screen. You may need to scroll down to reach the final button.
Select I agree or the equivalent option to finish creating the account.
Step 10: Open your new Gmail inbox
Once the account has been created, Google may take you directly to Gmail. If it does not, open Gmail while signed in to the new account.
The inbox is the main page where new emails appear.
Google may place one or more welcome messages in a new inbox. These are normal messages explaining parts of Gmail.
Seeing the inbox means that the Gmail account has been created successfully.
Make a secure note of:
- Your complete Gmail address
- The password you created
- Any recovery information you added
Your complete Gmail address includes both the username you selected and the @gmail.com ending. Do not leave out the ending when giving the address to another person or using it to register for a service.
How to create a Gmail account on a phone
You can follow the same basic process on an Android phone, iPhone or iPad.
The simplest method is to open Google’s account sign-up page in your phone’s web browser. Select Create account, choose For my personal use, and complete the information requested.
You can also begin through the Gmail app:
- Open the Gmail app.
- Tap your profile picture or initial.
- Select Add another account.
- Choose Google.
- Select Create account.
- Choose For my personal use.
- Follow the instructions on the screen.
The Gmail account is not limited to the device used to create it. Once it has been set up, you can sign in to the same account on a computer, phone or tablet.